


When I first got into fungi photography, my biggest goal was simple. I just wanted the whole mushroom in focus. It sounded easy enough.
Then you get down on the forest floor, set your camera to shoot a tiny subject, and suddenly the depth of field is super thin. The cap is sharp, but the stem is blurry. You get the stem sharp, but the gills become blurry.
At first, I was fiddling around with autofocus and not really taking full advantage of manual mode. I was mostly guessing, squinting at the back of the screen, and hoping I nailed it. This wasn’t reliable.
Back then, I was using an older Olympus PEN Lite E-PL6. It was a great little camera, but it did not have the focus bracketing feature I rely on now.
Once I discovered how useful focus bracketing was, there was no turning back.
Focus stacking vs. focus bracketing
These terms get mixed up a lot, so here is the simple version.
Focus bracketing is when your camera takes a series of photos, shifting the focus slightly between each frame. One photo focuses on the front edge of the subject, the next photo focuses a little farther back, then the next, and so on.
It’s like slicing a loaf of bread. Each slice is a thin layer of focus. On its own, one slice does not show the whole loaf. But when you stack all the slices together later you get the whole thing as one perfectly sharp, in-focus image.
Focus stacking is the part where those images are put together into one final photo with more depth of field.
Some cameras can do focus stacking in-camera, but there is usually a limit to how many images they will combine. Often it is around 12 to 15 frames, depending on the camera.
That can work for some subjects, but with mushrooms, slime molds, and other tiny organisms, I want more control.
That is where focus bracketing is more useful.
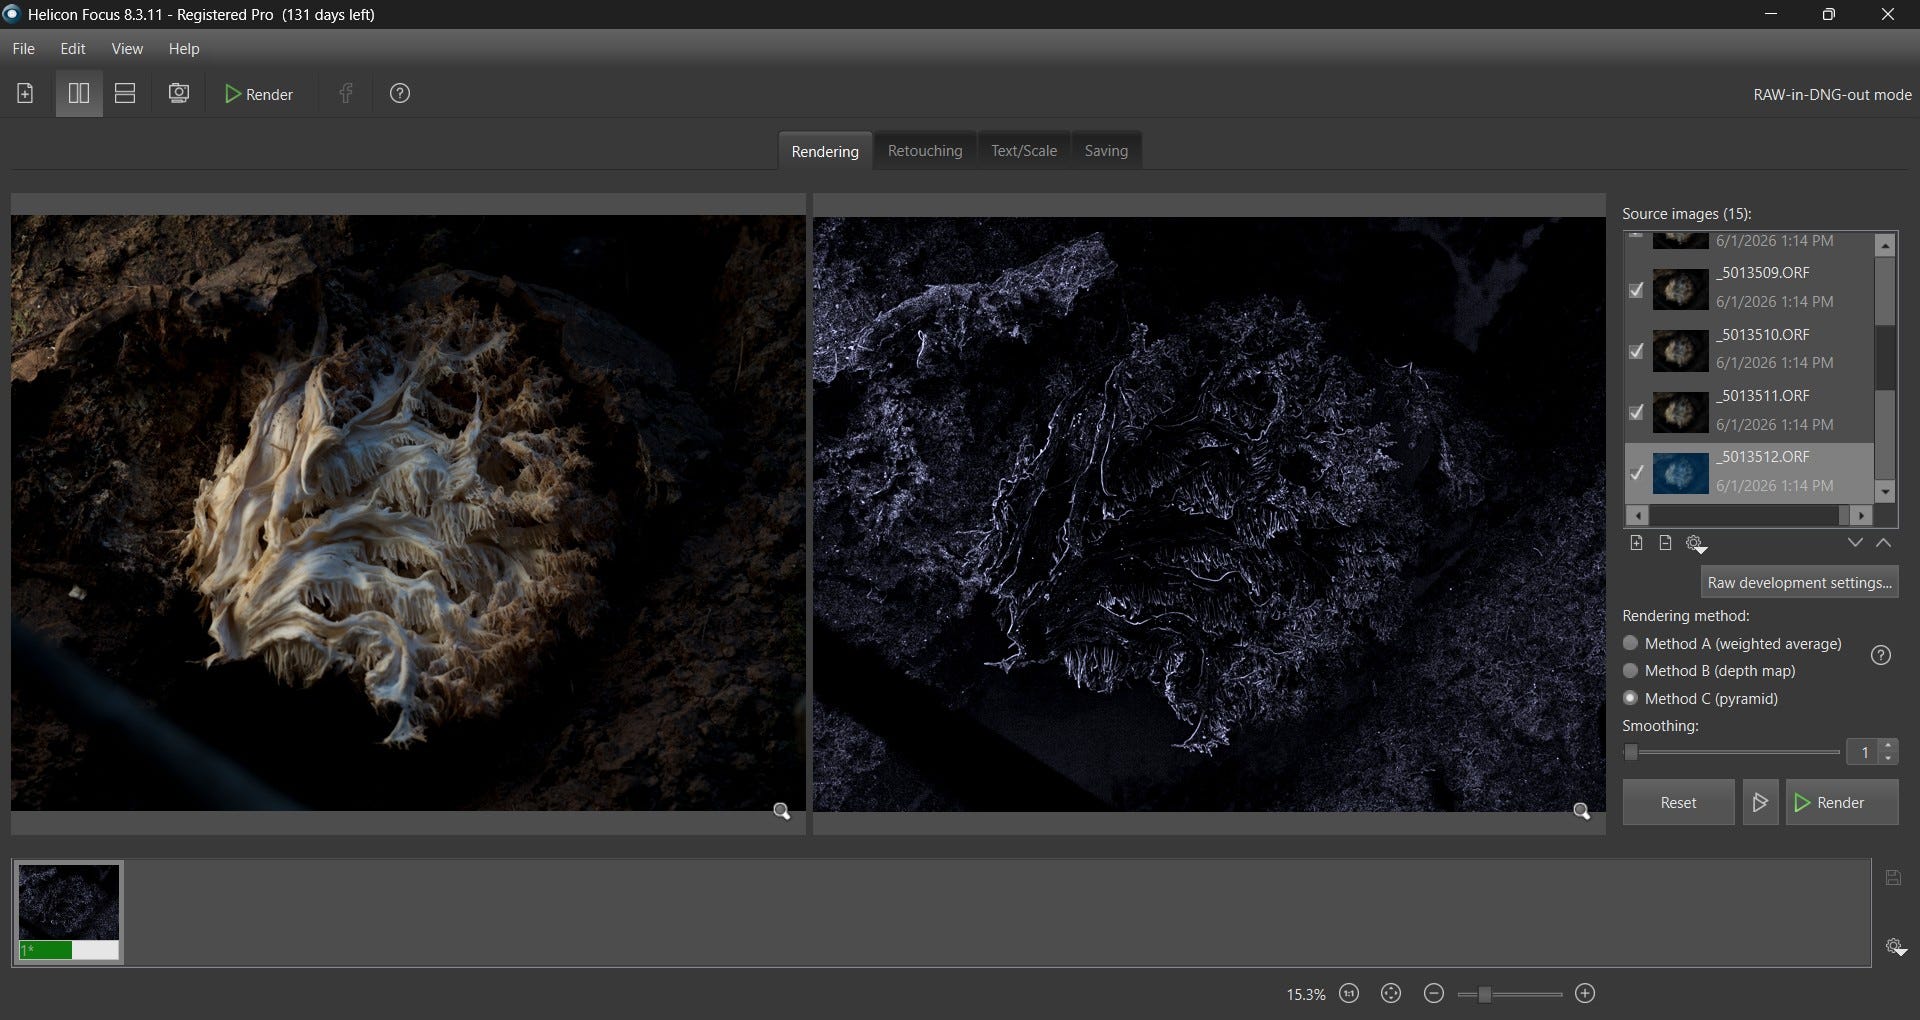
Focus bracketing lets you take many more images and stack them later in software like Helicon Focus or Zerene Stacker. Both offer 30-day free trials.
Technically, some cameras allow very high frame counts, even up to 999 images, but that is overkill. Some photographers shooting slime molds may take 250 to 300+ images for one stack, or more.
For medium sized mushrooms, I am usually somewhere around 30 to 60 images. Tiny ones I’ll hit 120-250+, sometimes more, sometimes less. It depends on the size of the subject, how close I am, and how much depth I need.
My basic camera setup
I’ll mainly talk about the settings on my camera, the OM-D E-M5 Mark III.
On my camera, there is Differential.
This controls how big the focus jump is between each shot. A smaller number means smaller steps, which gives you more overlap and means you’ll need more images to cover the subject.
I usually keep my Differential around 2.
For extremely tiny subjects, I may use 1. The smaller the subject, the more delicate the focus steps ought to be.
Starting the bracket
Once I find what I want to photograph, I set up my tripod and get my composition sorted. I try to think about the rule of thirds, the background, the angle, lighting, etc.
After that, I carefully adjust focus toward the very front of the subject.
It took me a while, but I eventually learned about focus peaking.
Focus peaking is one of those camera features that feels like someone finally turned the lights on. It places a colored overlay on your screen that shows where the sharpest areas are (like a little highlighter pen for focus).
Not every camera has focus peaking, but if yours does, it makes macro work so much easier.
I like to start just slightly in front of the subject. I want the front edge to be a little out of focus at the beginning. That gives me a little buffer. Later, I can cull the extra frames if I do not need them.
The same idea applies at the end of the stack. I keep shooting until the focus has moved all the way through the subject and the back edge has gone out of focus too.
I would rather overshoot a little than stop too early and realize later that the back of the cap or stem never made it into focus.
Ending a bracket too soon is one of the most frustrating things, because everything looks great until you get home and discover the final slice of the mushroom sandwich is missing.
RAW + JPG workflow
I shoot both RAW and JPG.
Yes, this eats up memory fast. I use a 512 GB card because a good mushroom foray can easily turn into thousands of images. Focus bracketing is not shy and will happily fill your card.
The reason I shoot both is that JPGs are convenient for viewing and sorting, while the RAW files give me more flexibility later.
The JPGs help me quickly see where each stack begins and ends.
Helicon can stack the ORF (Olympus Raw File) images and output a DNG file, which I can later edit in Adobe Camera Raw, Lightroom, or Photoshop. That gives me a single stacked RAW-style composite with much more non-destructive editing flexibility.
Sorting after a foray
After a foray, I transfer everything to an external hard drive.
Then I sort by file type and look through the JPGs first. I find the first image and the last image of each stack I want to use. I copy and paste those bookend file names down in Notepad.


Once I have my list, I create a separate folder on my desktop for each stack. I rename each folder using the bookend file names so I know exactly what goes inside.
Then I find the corresponding ORF files, select the ones for that stack, and copy them into the correct folder.
It sounds a little tedious, and it is, but it keeps everything organized. When you are dealing with thousands of photos, organization is the difference between a smooth workflow and staring at your screen wondering where your life went wrong.
Batch processing in Helicon
Once my folders are ready, I open Helicon Focus.
I hit F7 for Batch Process. Then I choose my destination folder, select multiple folders, add all the stack folders, choose Method C, and hit Render.
Then I go do something else.
Chores, coffee, dinner, anything but sitting there watching the stacks on my laptop screen.
Sometimes I run batch processing overnight and wake up to a folder full of finished stacks. It gives me another reason to get up in the morning!
From there, I can edit each final image in Adobe Camera Raw, Lightroom, and/or Photoshop.
JPG stacking option
If you do not care about keeping a RAW-style workflow, you can stack JPGs instead. This is usually much faster and takes up less storage.
The tradeoff is that you have less flexibility in post-processing. For casual stacks, social media, or quick documentation, JPGs are perfectly fine. For images I really care about, I prefer the RAW workflow.
Below is a chart that covers the brand and corresponding terminology for “focus bracketing” and I tried to find the oldest model for an entry point (low cost option). If there are other models I’ve missed do let me know in the comments and I’ll update the chart.
If you made it this far and aren’t dizzy, I applaud you!
I hope this helped make focus bracketing and stacking feel a little less daunting. If you found it useful, I’d love to hear your thoughts in the comments.
If you’d like to support more tutorials like this, consider becoming a paid subscriber.
Paid members will help make it possible for me to create more in-depth guides, behind-the-scenes breakdowns, and full video tutorials on macro fungi photography, focus stacking, field techniques, and editing workflows.
And if monthly subscriptions aren’t your thing, a one-off donation through Buy Me a Coffee is mush appreciated.
I should re-name that to “Buy Me a Camera” as every bit of support helps me keep making these resources/images and spend more time documenting the tiny worlds of fungi and forest-floor life. Eventually I’d like to upgrade my gear so I can share even better macro images and tutorials with you.
Till next time!

